Import
Fresh Cards supports importing decks using multiple formats:
- Freshpack
- text file
- csv or tsv file
- dragged text
- Anki decks (.apkg files)
Please read the following sections for more details.
Starting an import on macOS
To start an import, you have three options:
- Drag the file (or text) into the deck list. This will present an import preview and target a new deck.
- Drag the file (or text) into the playlist. This will present an import preview and target the current deck.
- Click on the File / Import Deck menu item. Select the file you wish to import. By default, a new deck will be targeted.
- Click on the File / Import from Clipboard menu item. This will attempt to import the text contents of the clipboard.
With any of the options above, once the import preview window is presented, you can always pick a different target deck before the import actually begins.
Starting an import on iOS
Importing decks on iOS is possible, although not as simple as a drag and drop operation.
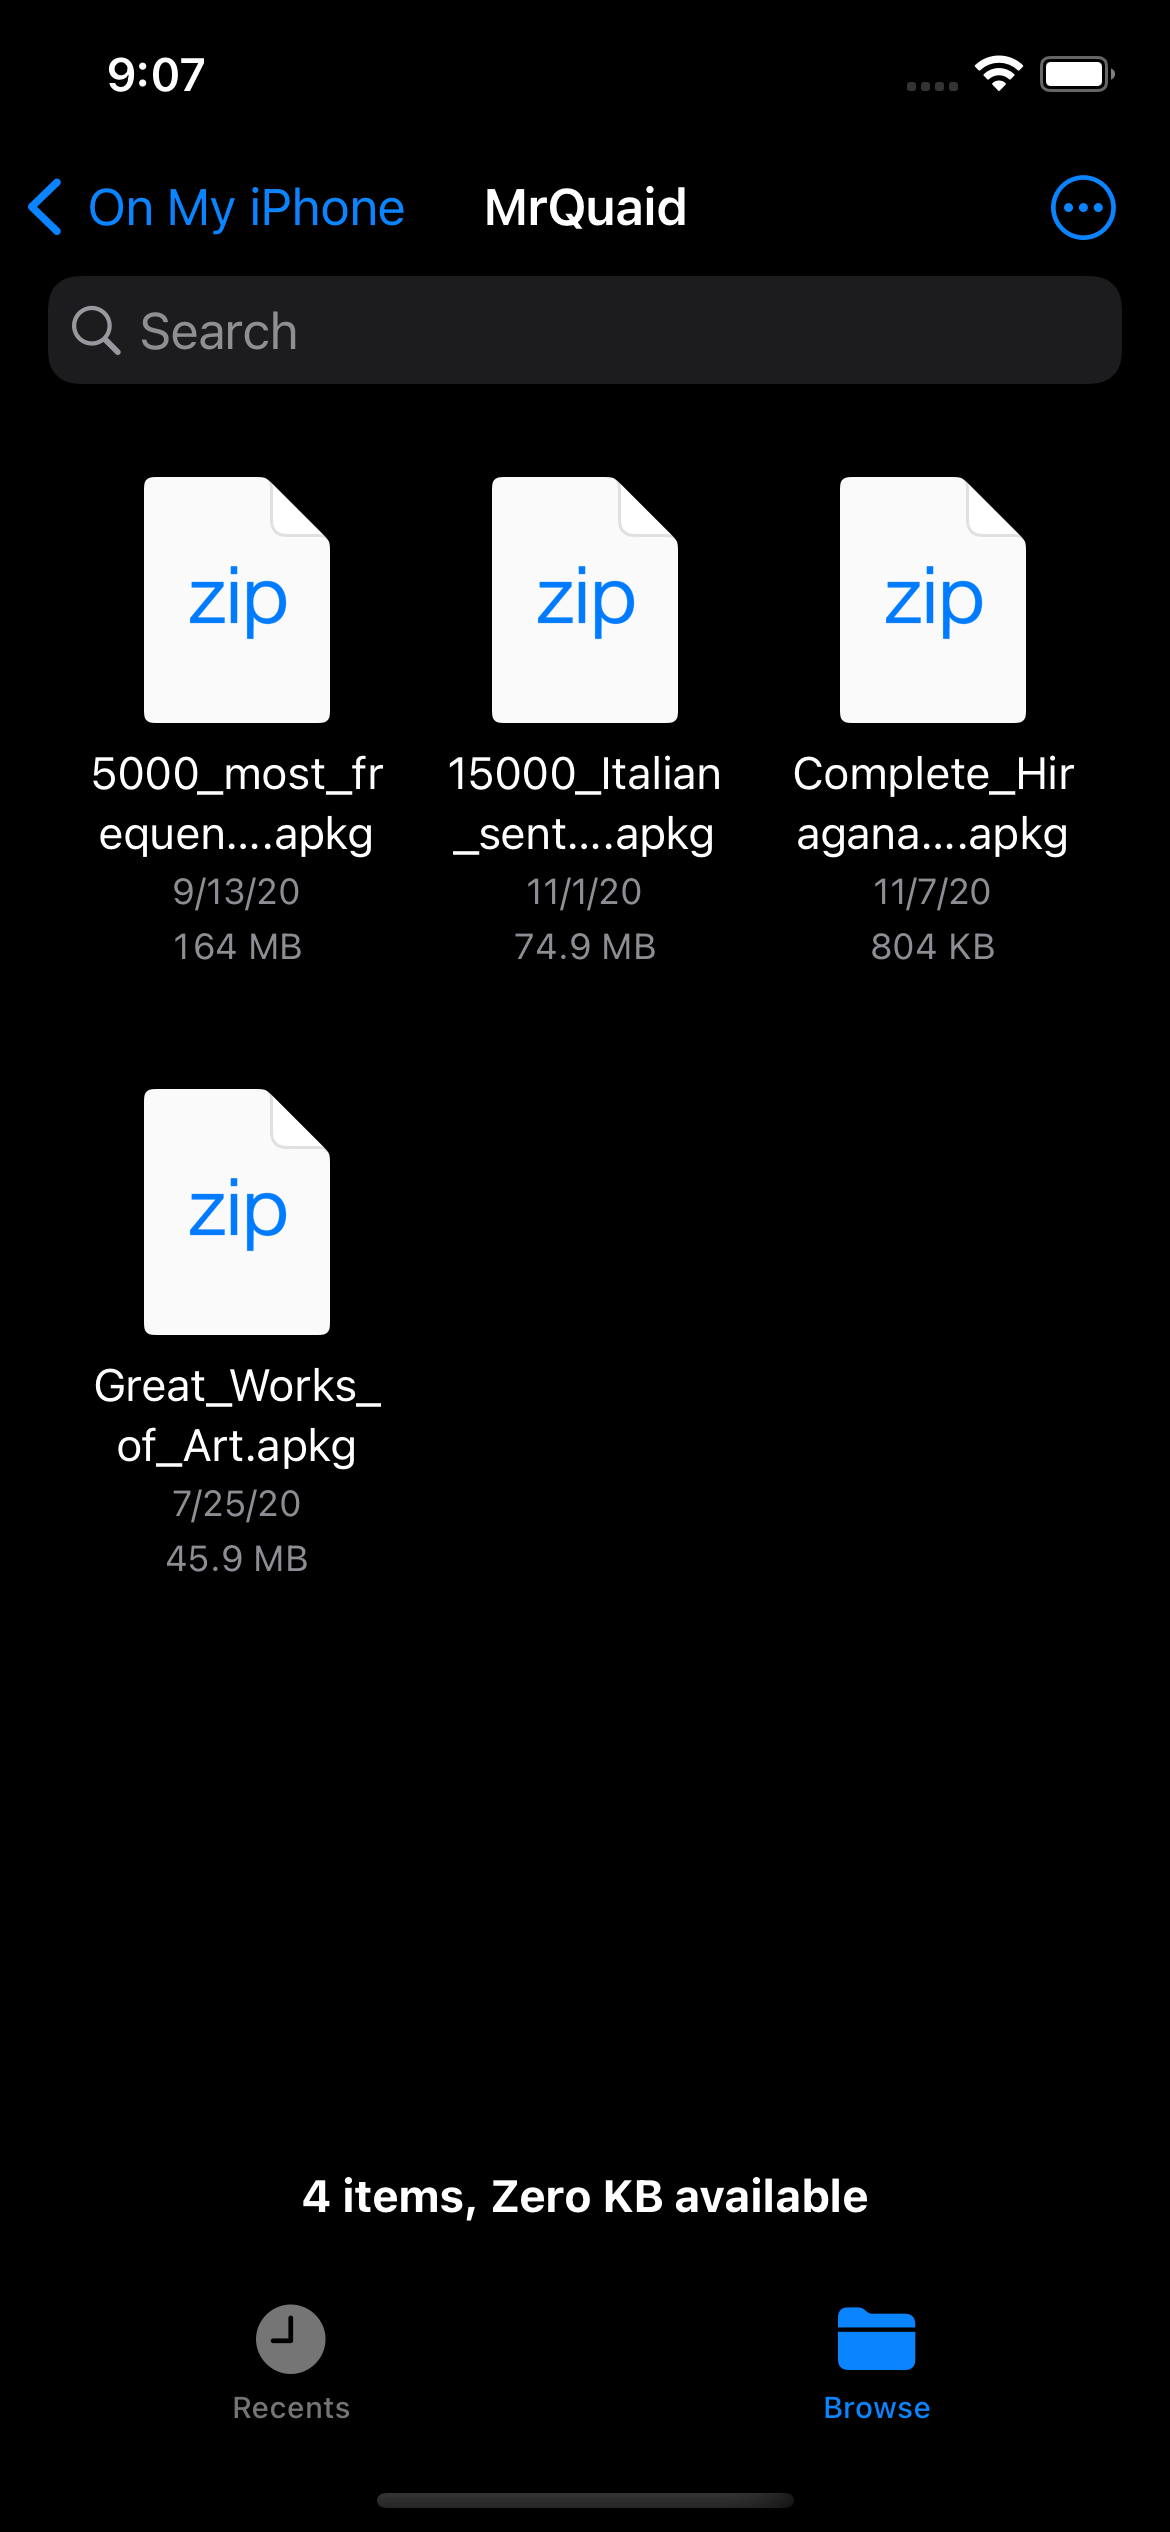
To get started, save the deck you wish to import into the Files app of your device. Open up the Files app.
Find the deck you wish to import in the app.
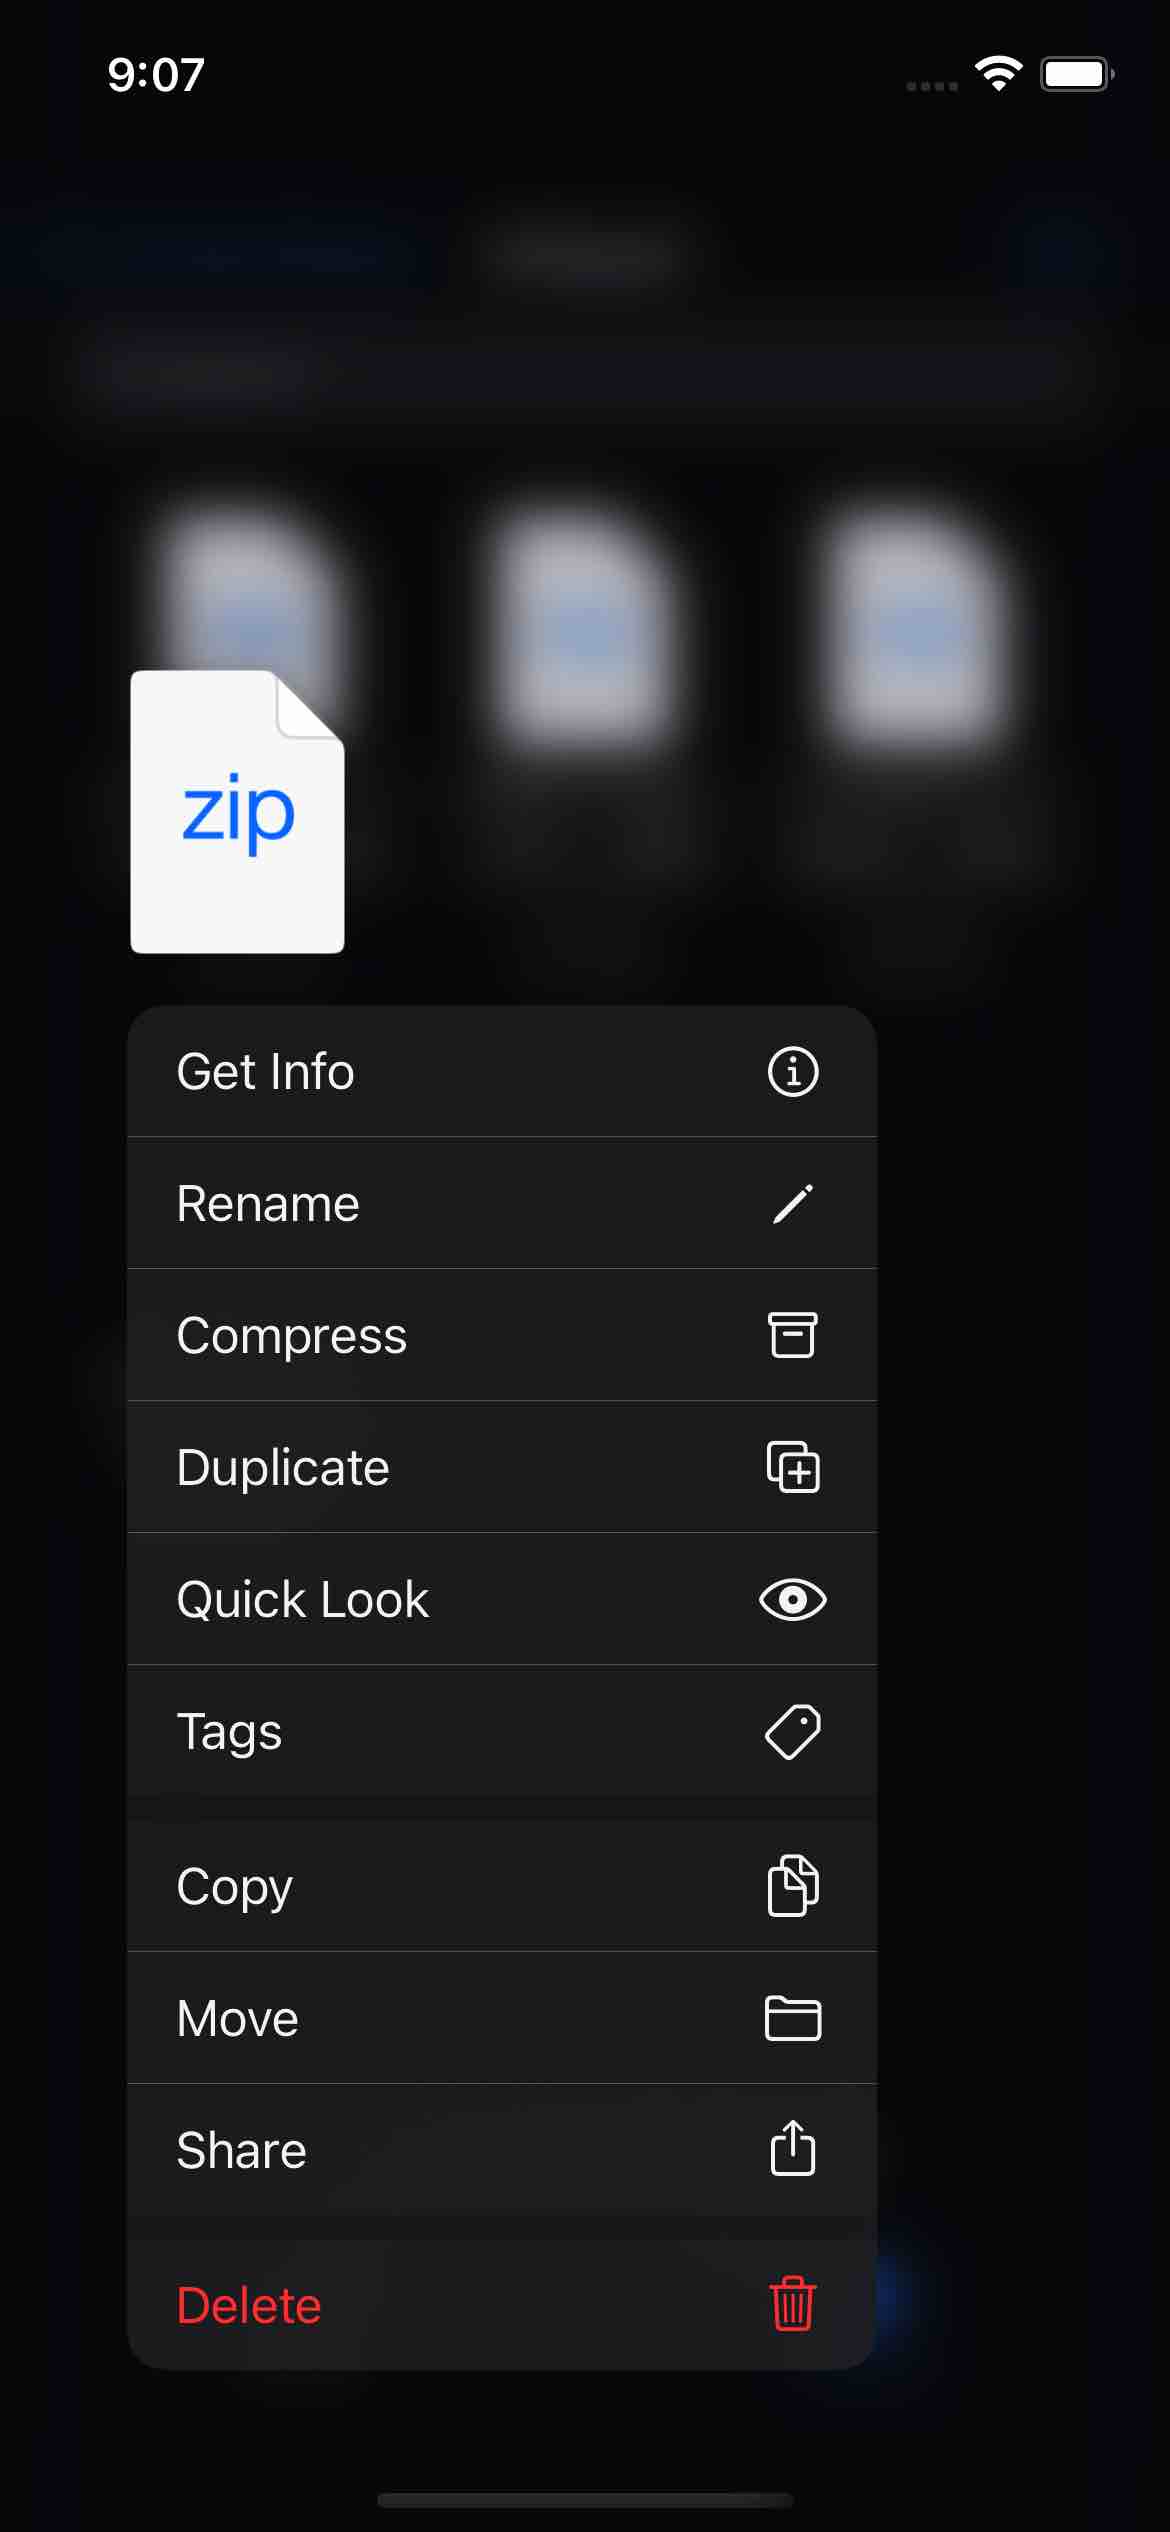
Long-press on the file you wish to import into Fresh Cards. A menu will appear. Select the “Share” option from the menu.
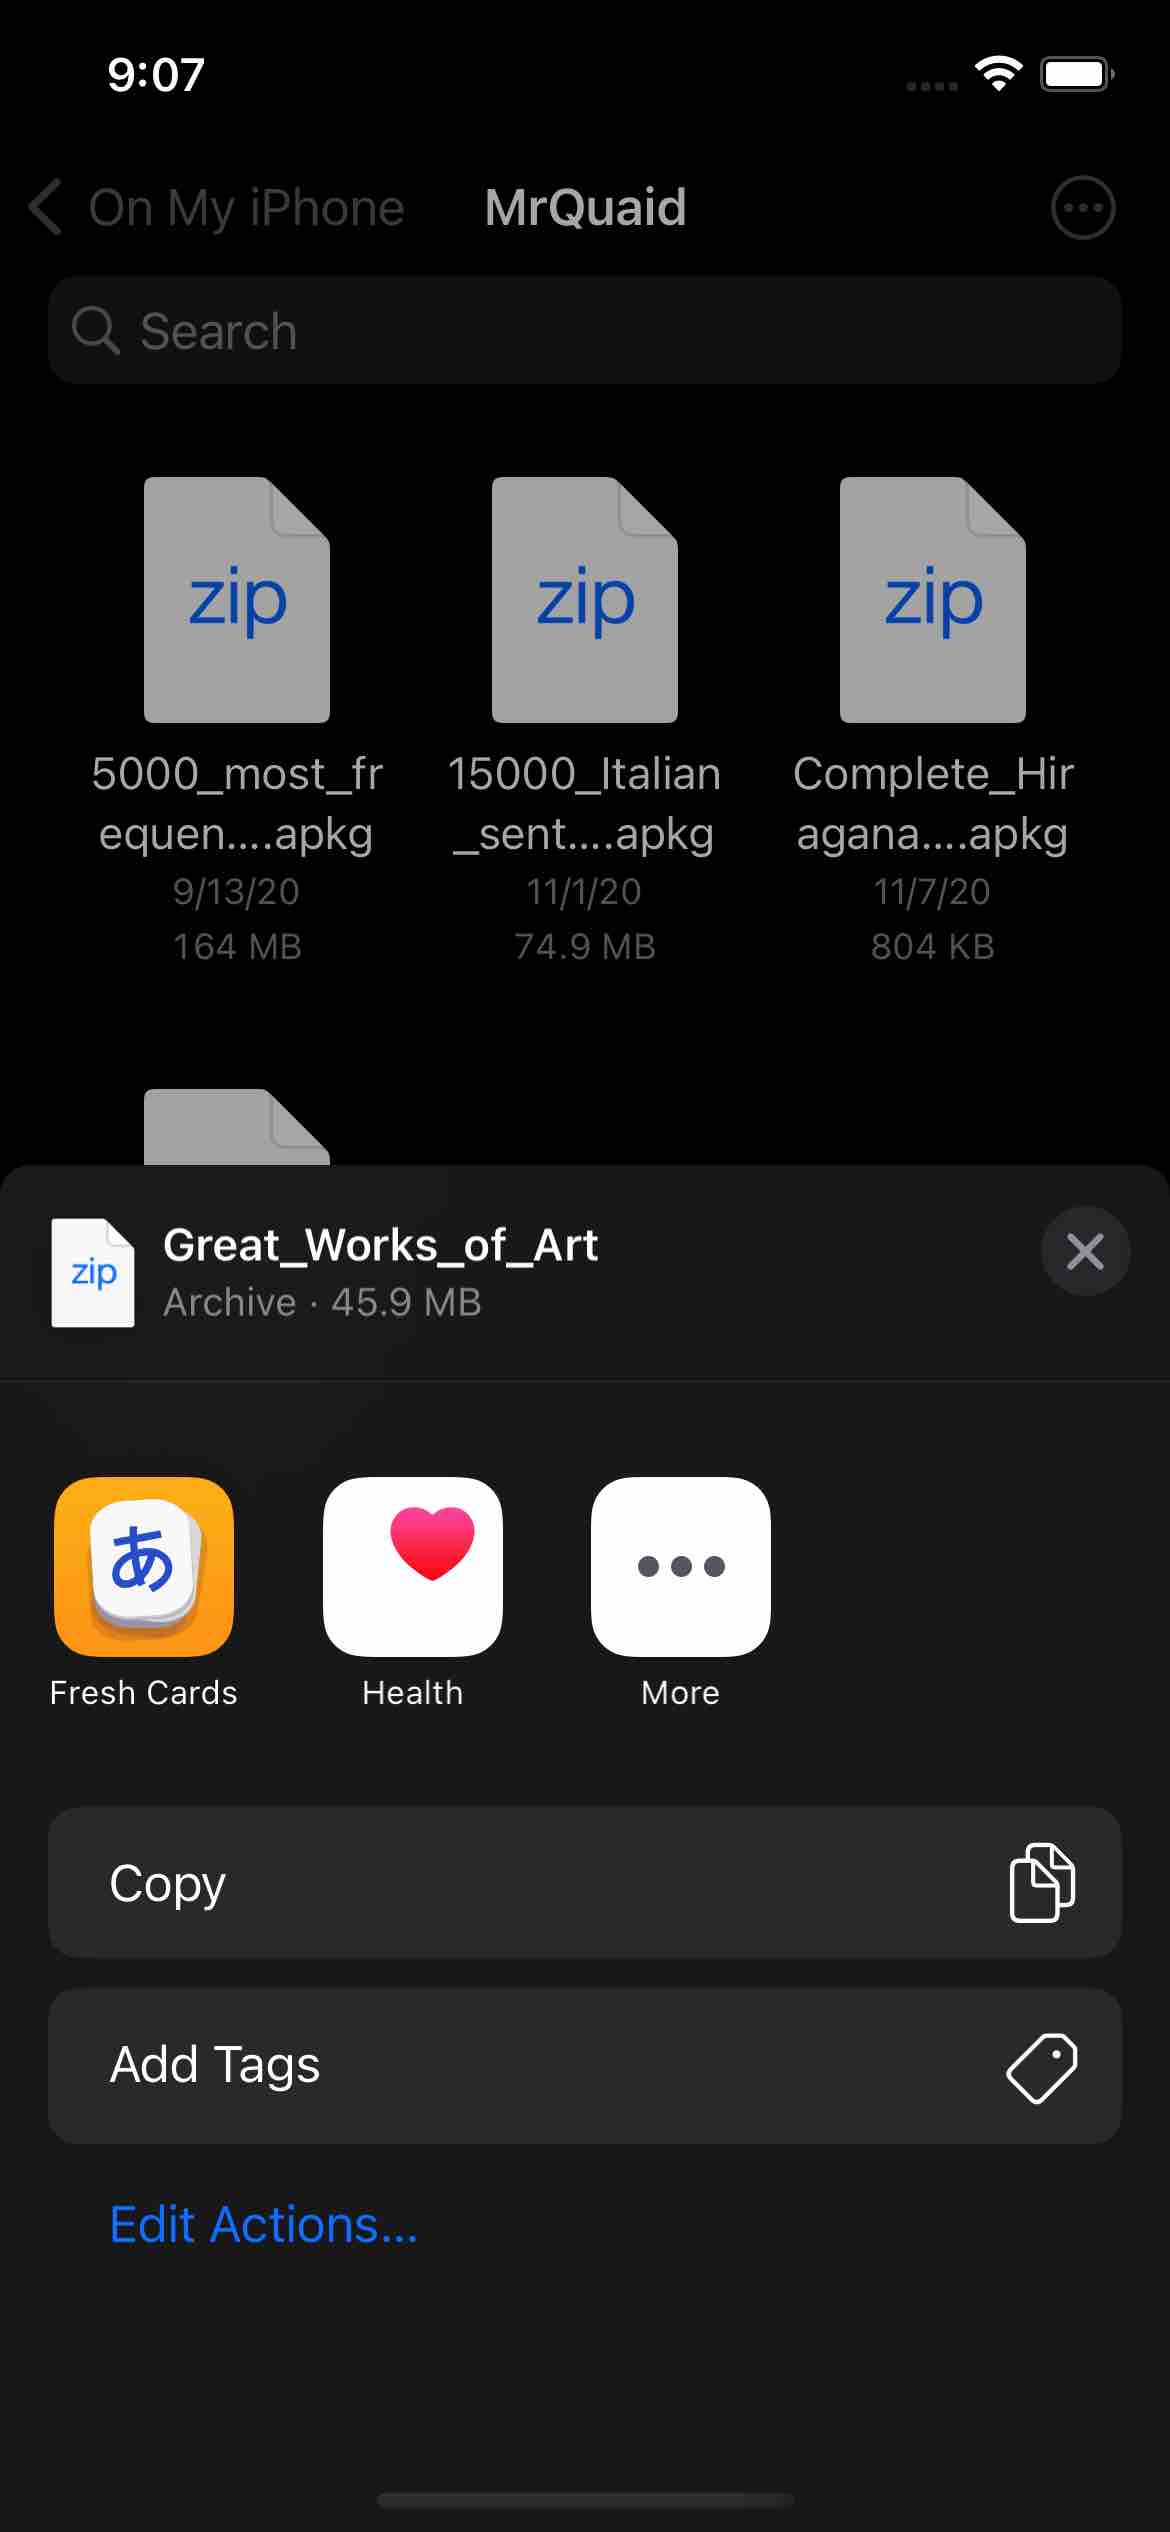
You will see the share UI. From there, find the Fresh Cards app and select it as the target app to share to. If you don’t see it on this screen, tap the “More” option and find Fresh Cards from the list on the next screen.
After you’ve tapped Fresh Cards in the previous step, the app will open and start an import process where you can select the cards you wish to import.
As with the macOS process, once the import preview screen is presented, you can pick the target deck you wish to import into.
Detecting duplicates and updates
Fresh Cards is smart when it imports decks and tries to find exact matches of cards that you already have. It will automatically unselect any duplicates it finds. However, if it recognizes the card as one you’ve imported before and it sees an update in the card’s contents, it will auto-select it. This allows your friend to make updates to their deck and re-export in the future to you and you’ll get all the new updates worry-free on the next import!
Import from text file
A text file is a great option if you wish to create several cards quickly without having to use the Fresh Cards UI. Check out the tech page on the text file format.
Import from csv and tsv files
Comma-delimited files (aka “comma-separated values”, CSV, files) are text files with content separated into rows, with each row being made up of multiple columns, each column separated by a comma. TSV are tab-separated values files and are similar to CSVs except their column contents are separated by tab characters.
These are files that are often exported from spreadsheet applications like Excel or Numbers.
You can import these files into Fresh Cards and the app will first pop up a configuration screen where you can choose which column is to be used as the front card text and which column is to be used as the back card text. You have several options for delimiter character as well, so not only are commas and tabs options, but semicolons, dashes, as well as a few others.
The only restriction with these files are that they must end in the .csv or .tsv extension to be draggable into Fresh Cards.
Import Anki decks (.apkg files)
Finally, Fresh Cards can has basic support for importing Anki decks. Anki decks can be complicated due to its support for full HTML and templates, so not all Anki decks imported into Fresh Cards will look correct.
A future update to Fresh Cards will add HTML and template support, making Anki compatibility closer to 100%, so if you would like to make use of an Anki deck, it may be best to wait a few versions.
To import an Anki .apkg file, drag the file into the deck navigation area. The entire Anki deck will be imported as a new deck. There is currently no supporting for importing into an existing deck, nor for picking and choosing which cards to import. Anki import might take some time for larger decks, so please be patient.
After importing the entire deck, you should be able to drag and drop individual cards from it into another deck. Click and drag the card from the card list tab and drop it into any other deck in the deck navigation area.
Dragging and dropping text from the web
Next time you see a list of foreign words and phrases online, you may be able to simply drag and drop said list into Fresh Cards to import them directly into your language deck.
Here’s an example of text that can be dragged from the web. Open up this page in a new tab.
Scroll down to the word list and select some of the rows.
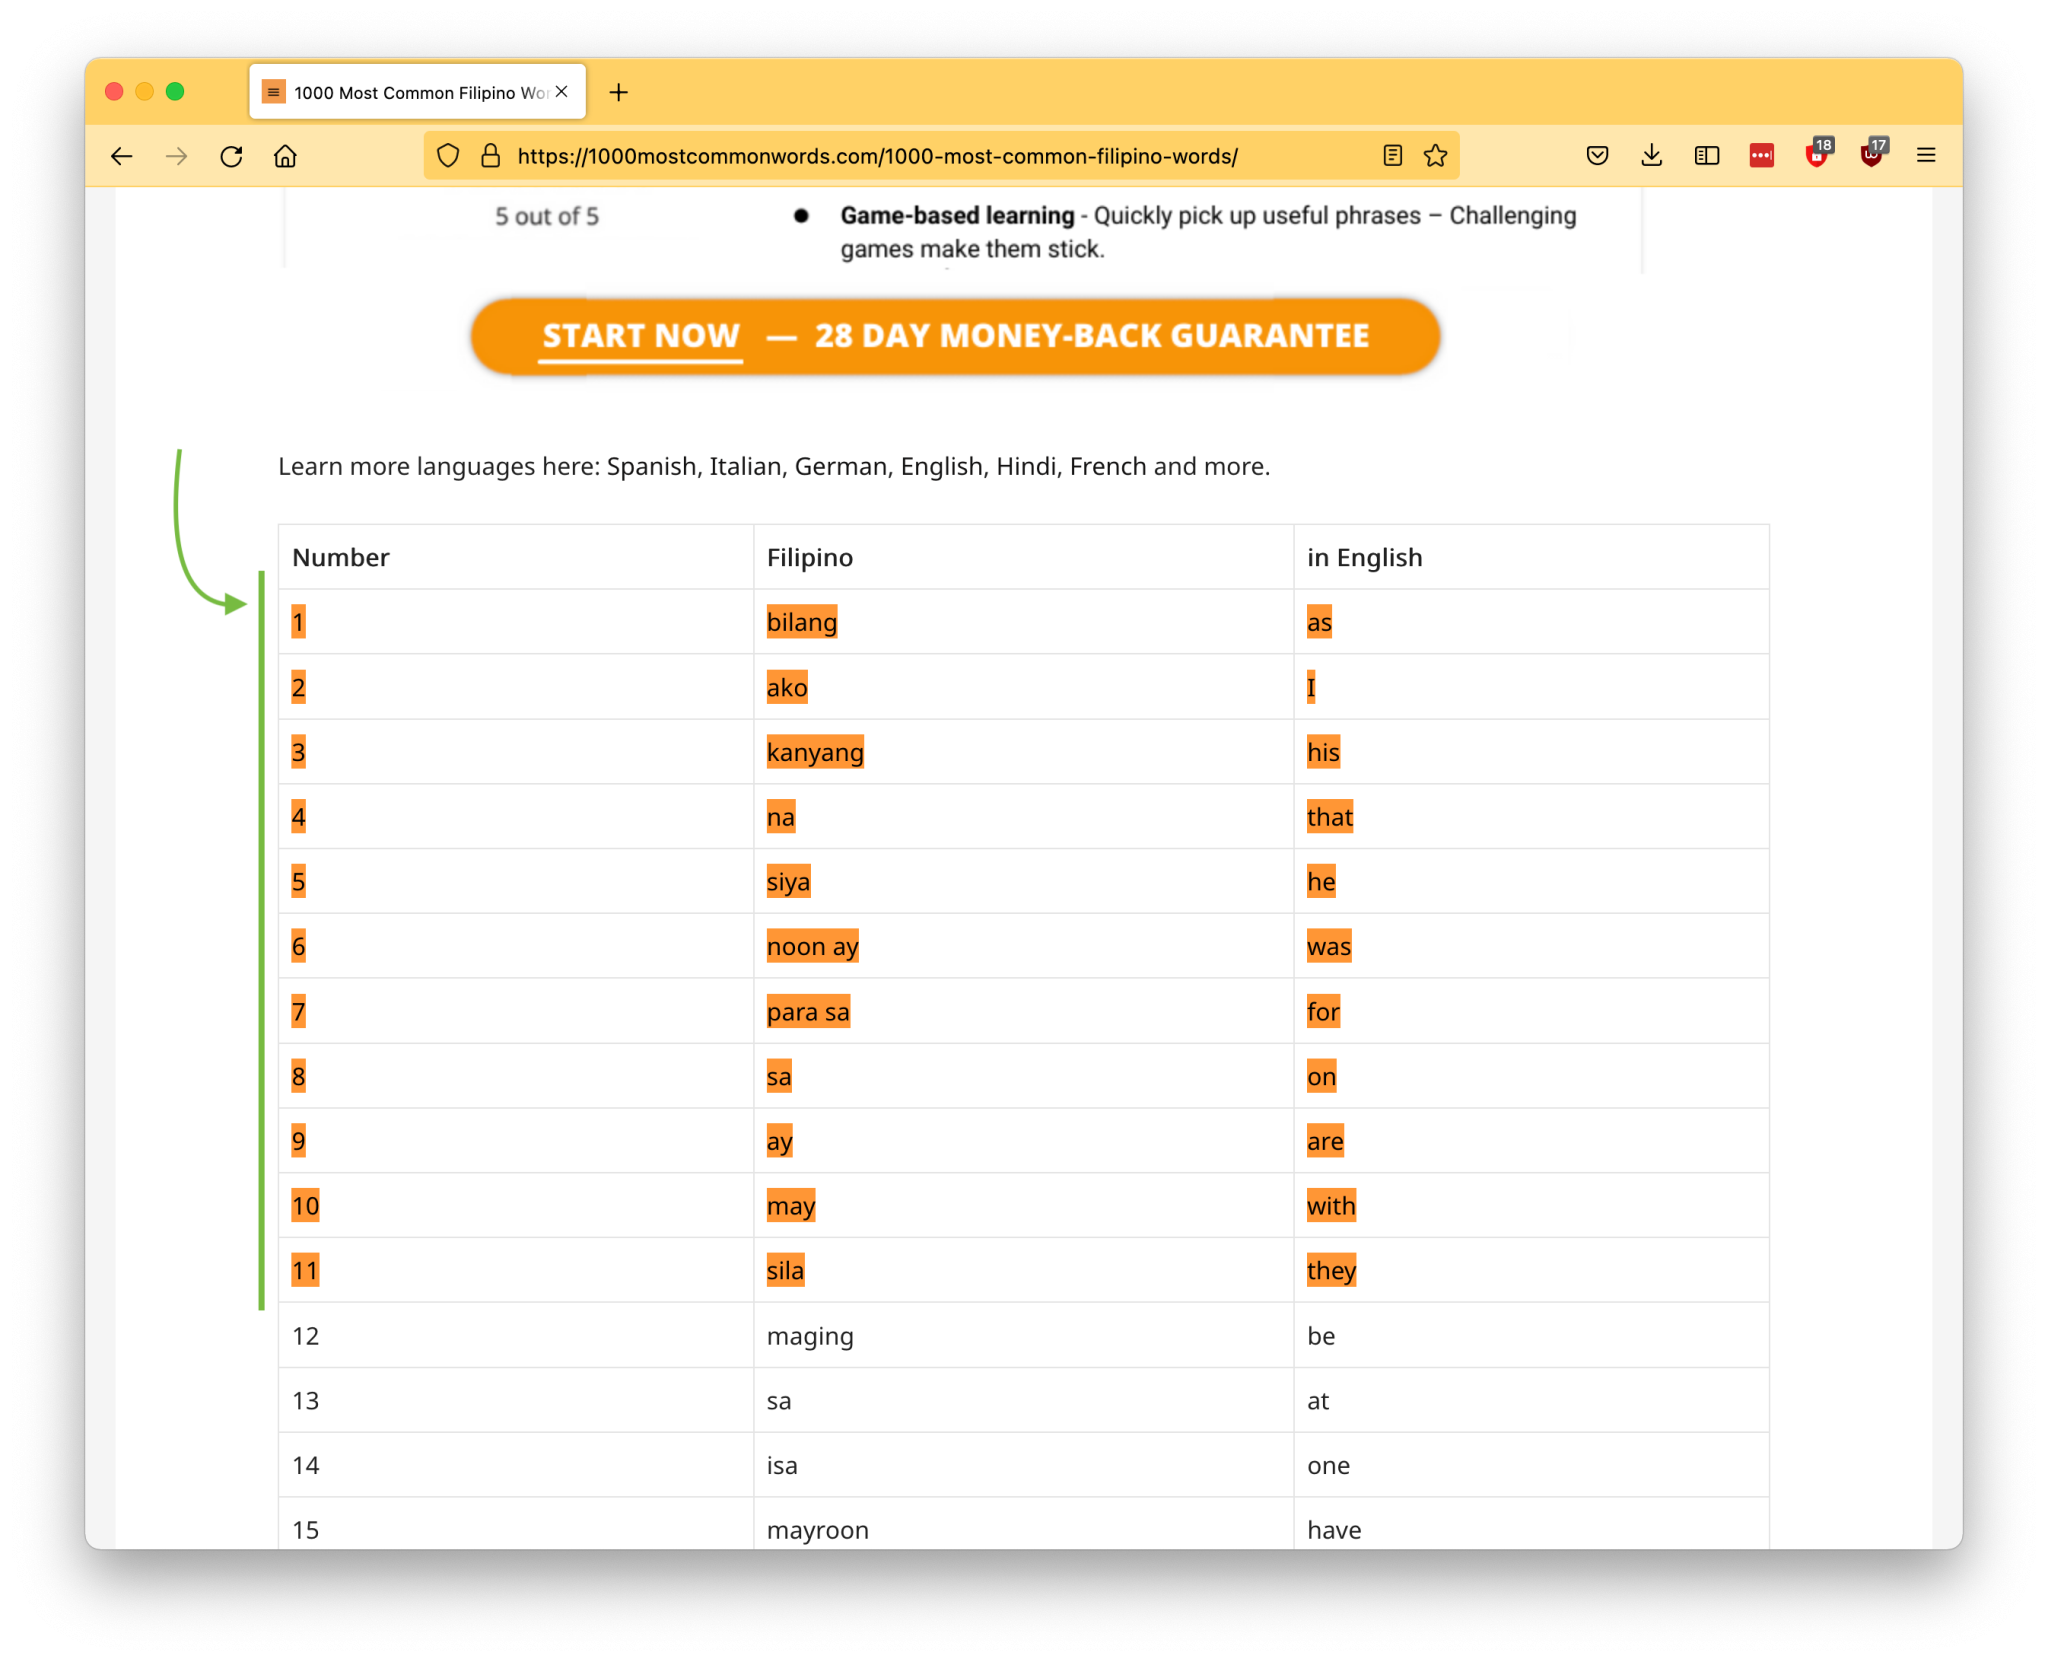
Now drag and drop that selected text into Fresh Cards. You’ll be presented first with the CSV settings screen. This is a screen that lets you pick the “delimiter” character (this just helps the app figure out where the columns are in the text you dragged). It also lets you choose which column in the table should be the front and which should be the back. The app will generally auto-detect the character, so just pick which column you want as the front and which you want as the back.
Once you hit the Preview button, you’ll the cards as they’ll appear when imported.
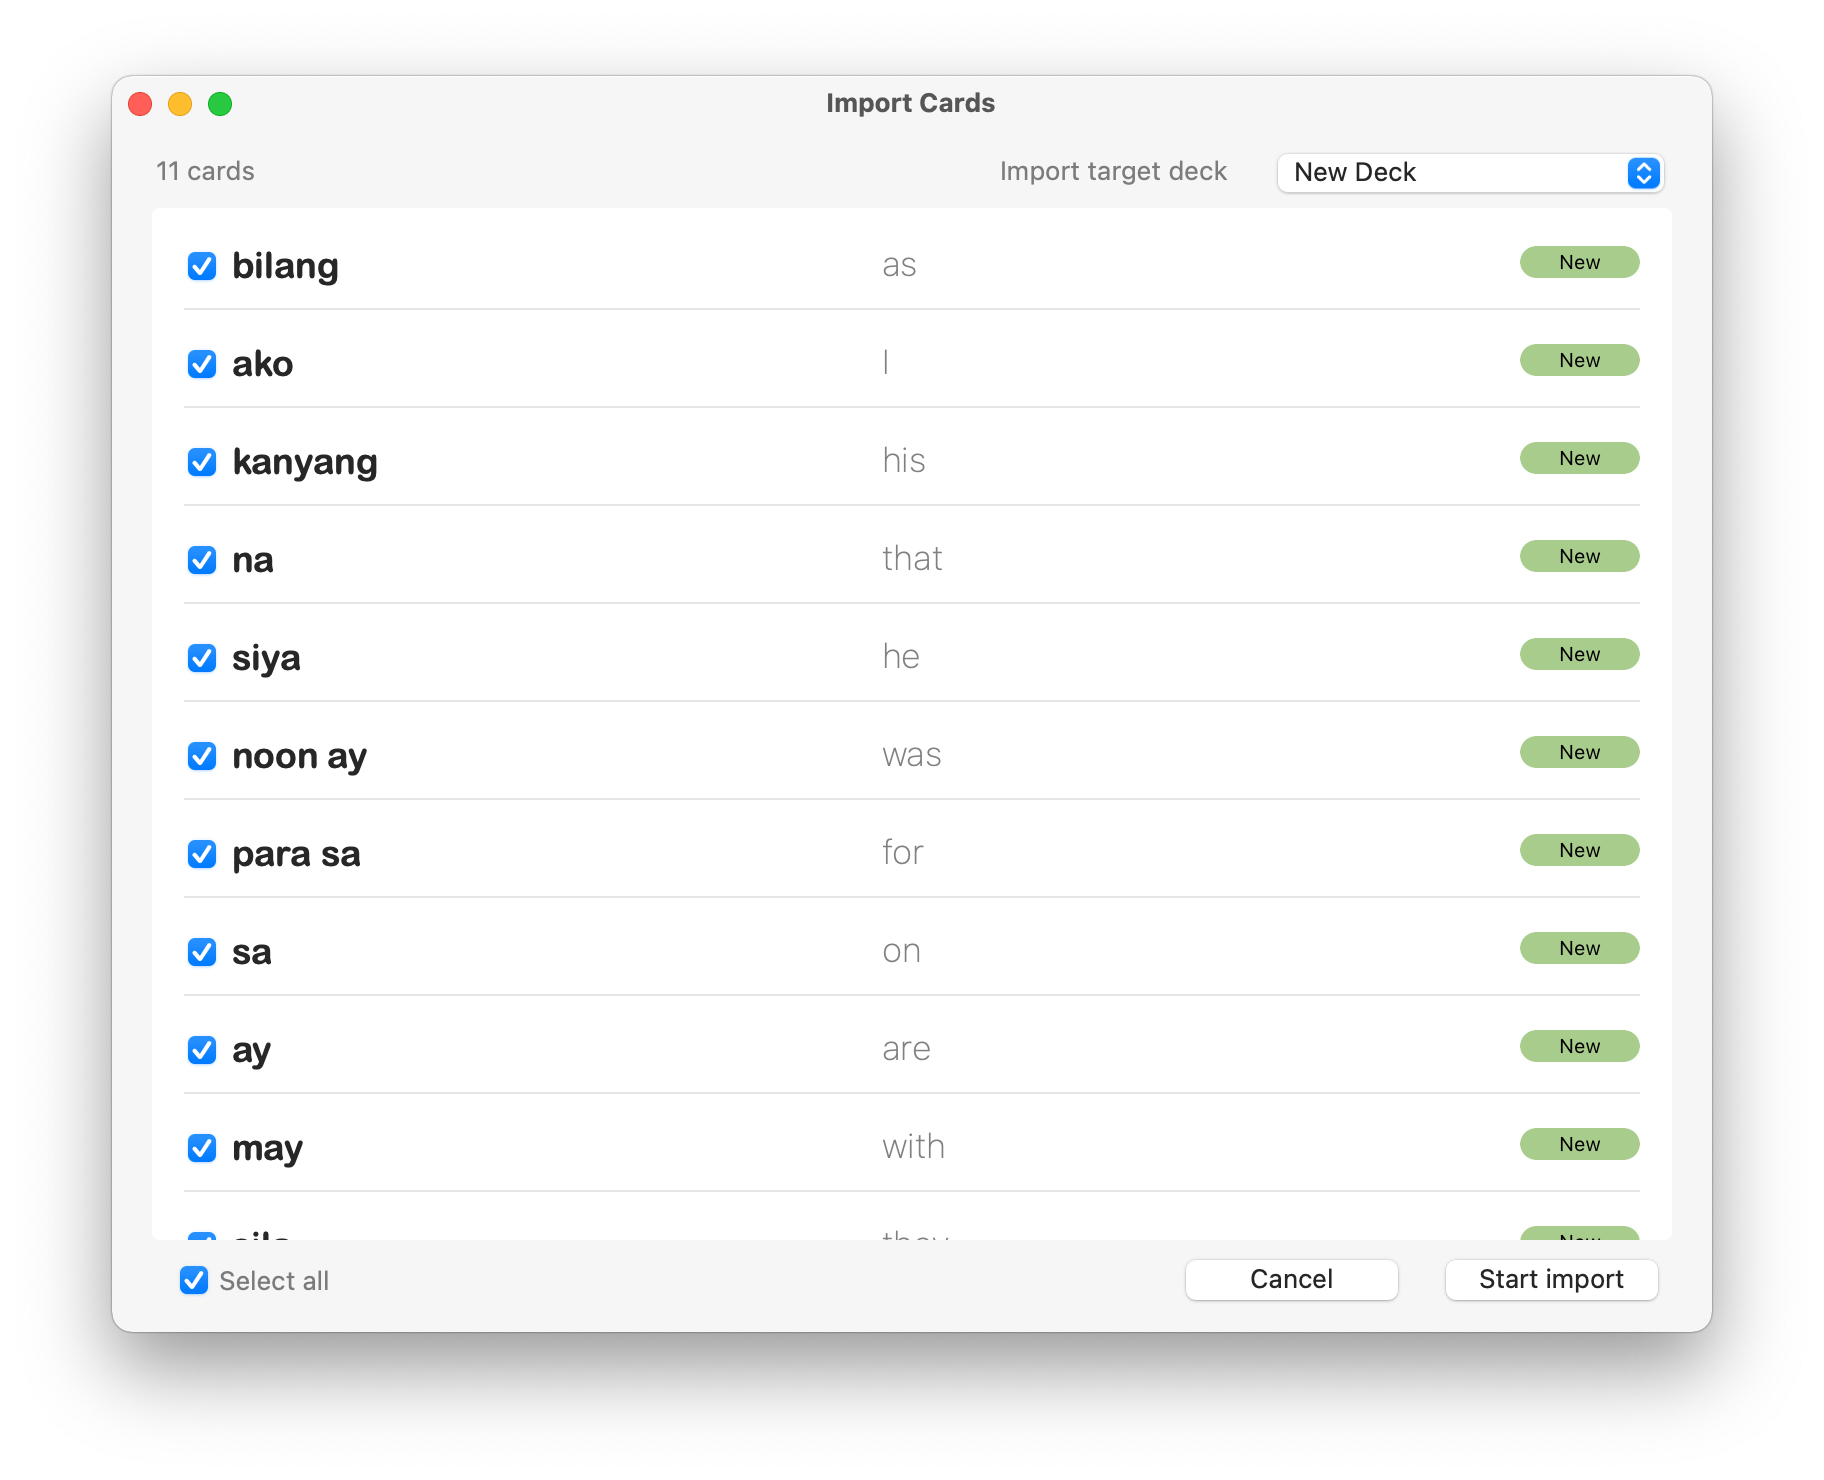
How cool is that?
If you see text like in the screenshot below (taken from this page) as opposed to in table format, you can import it as well.
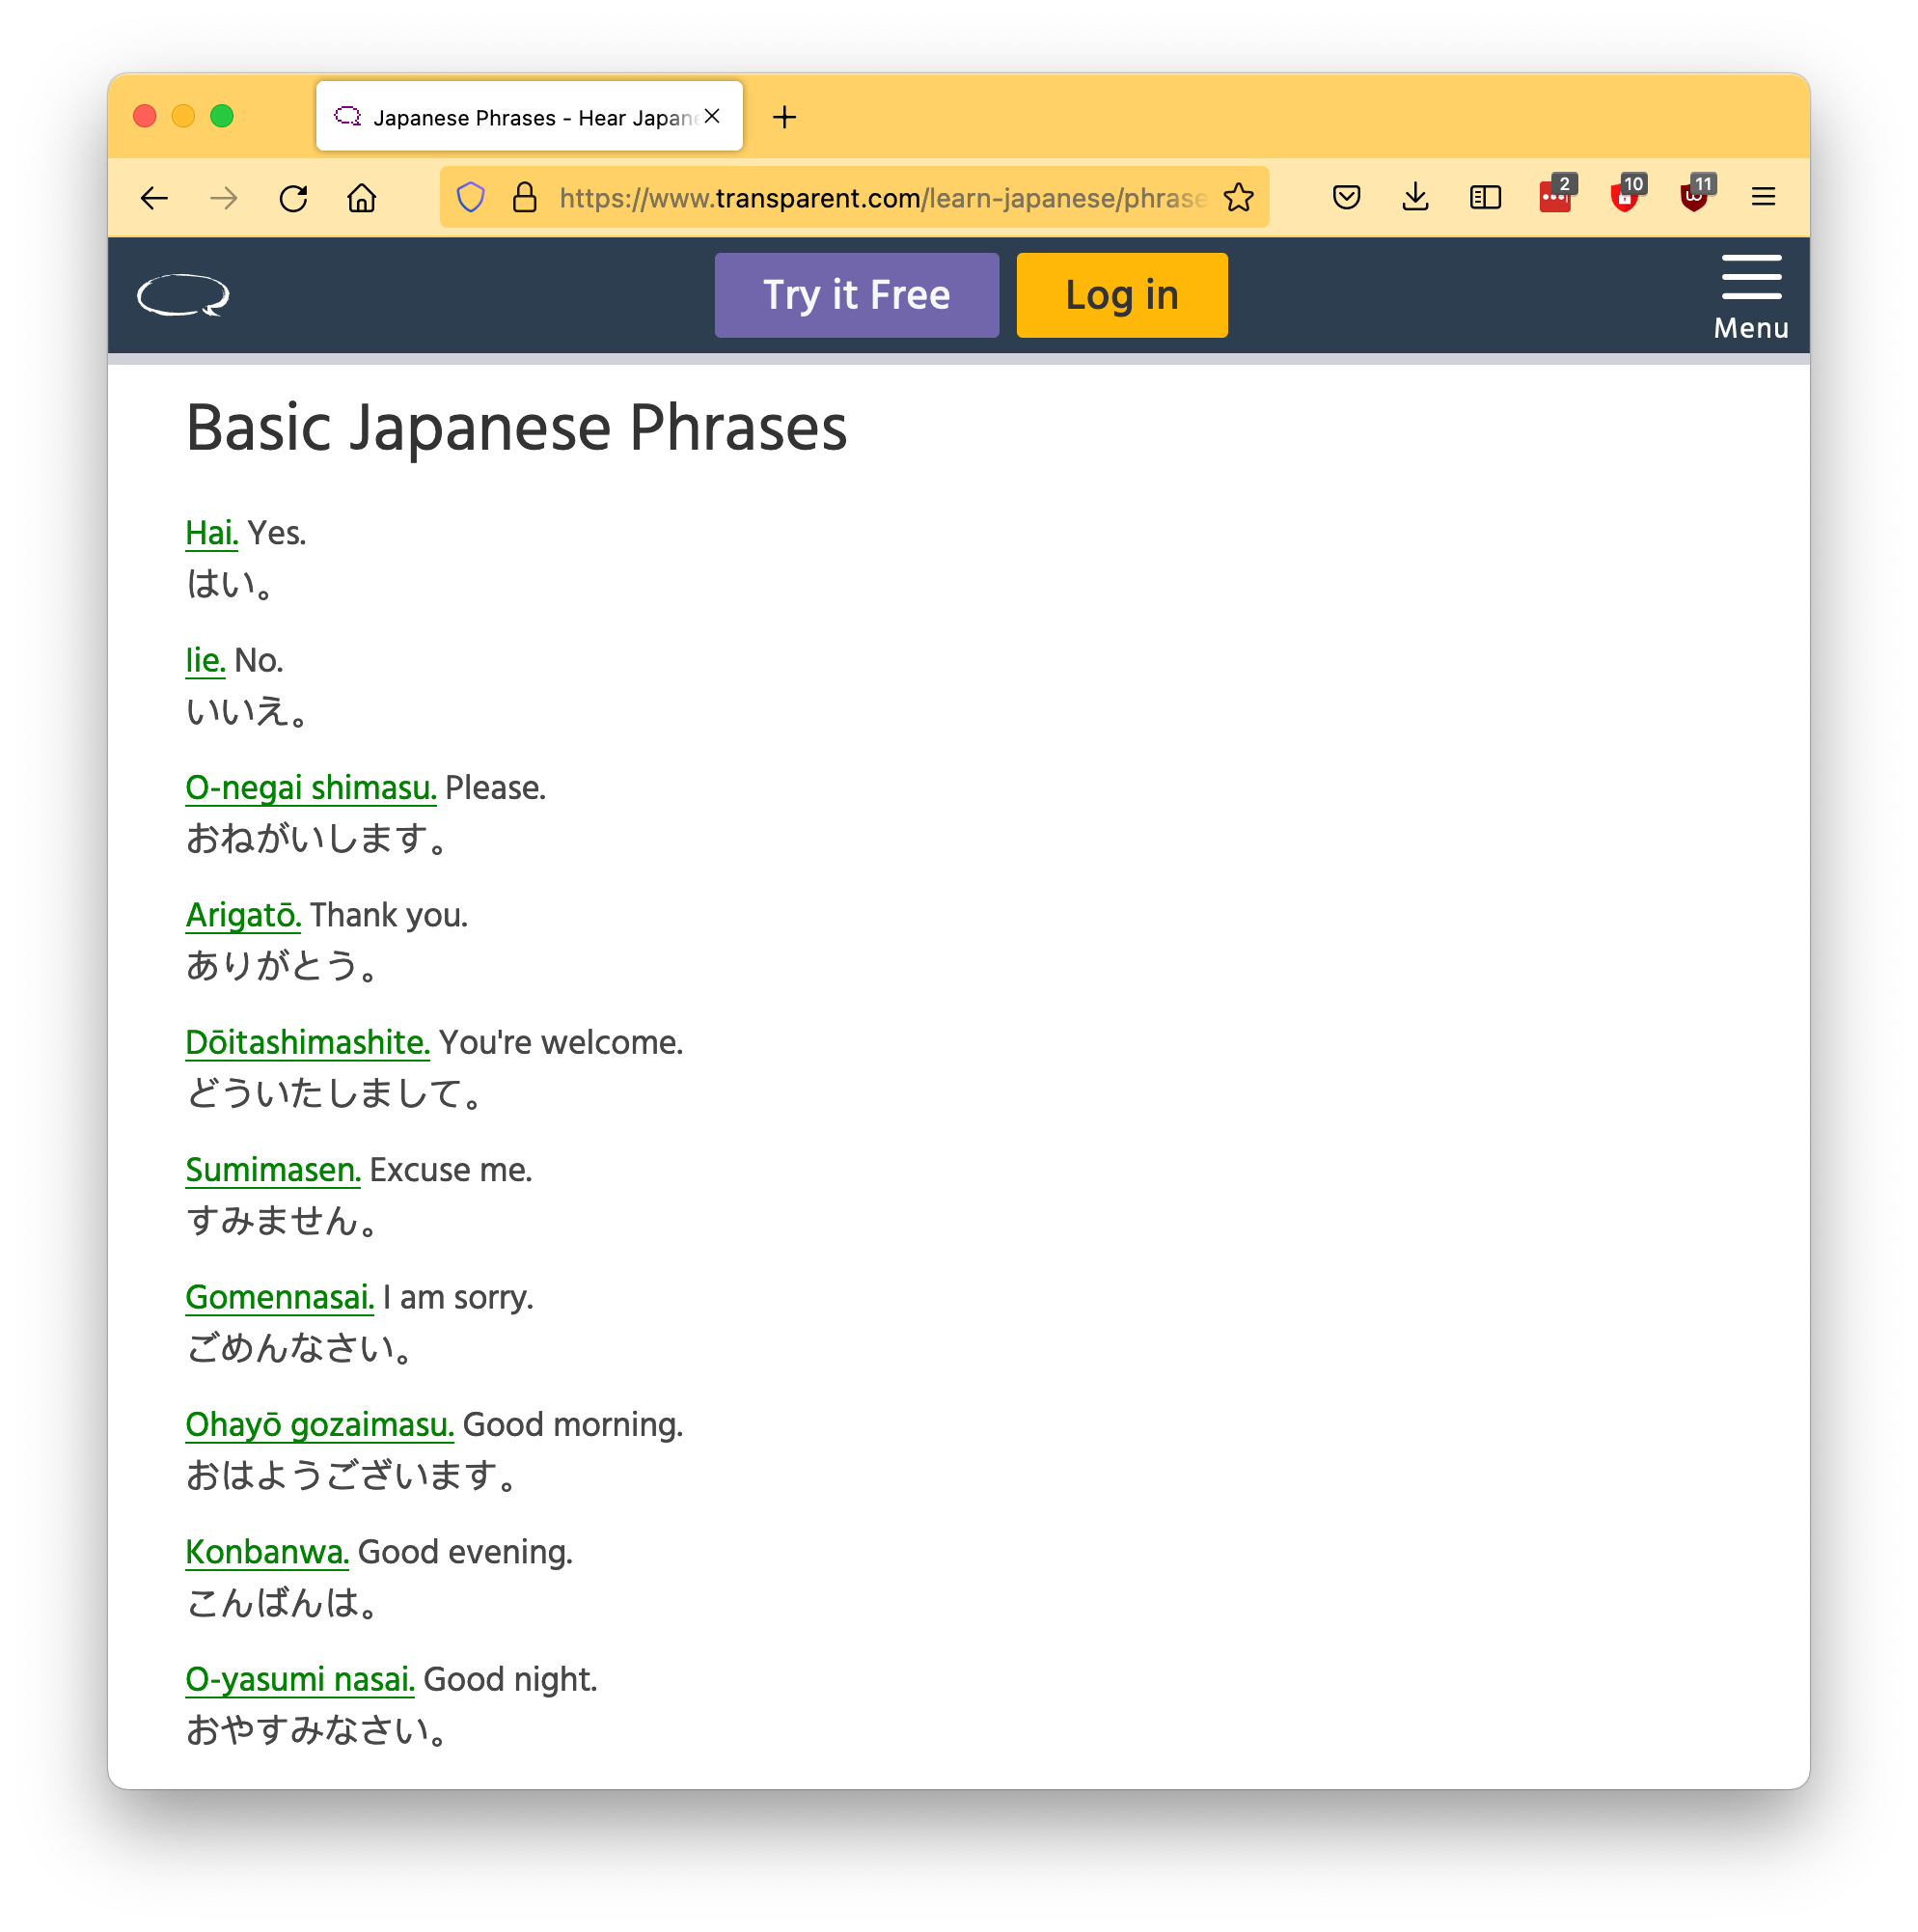
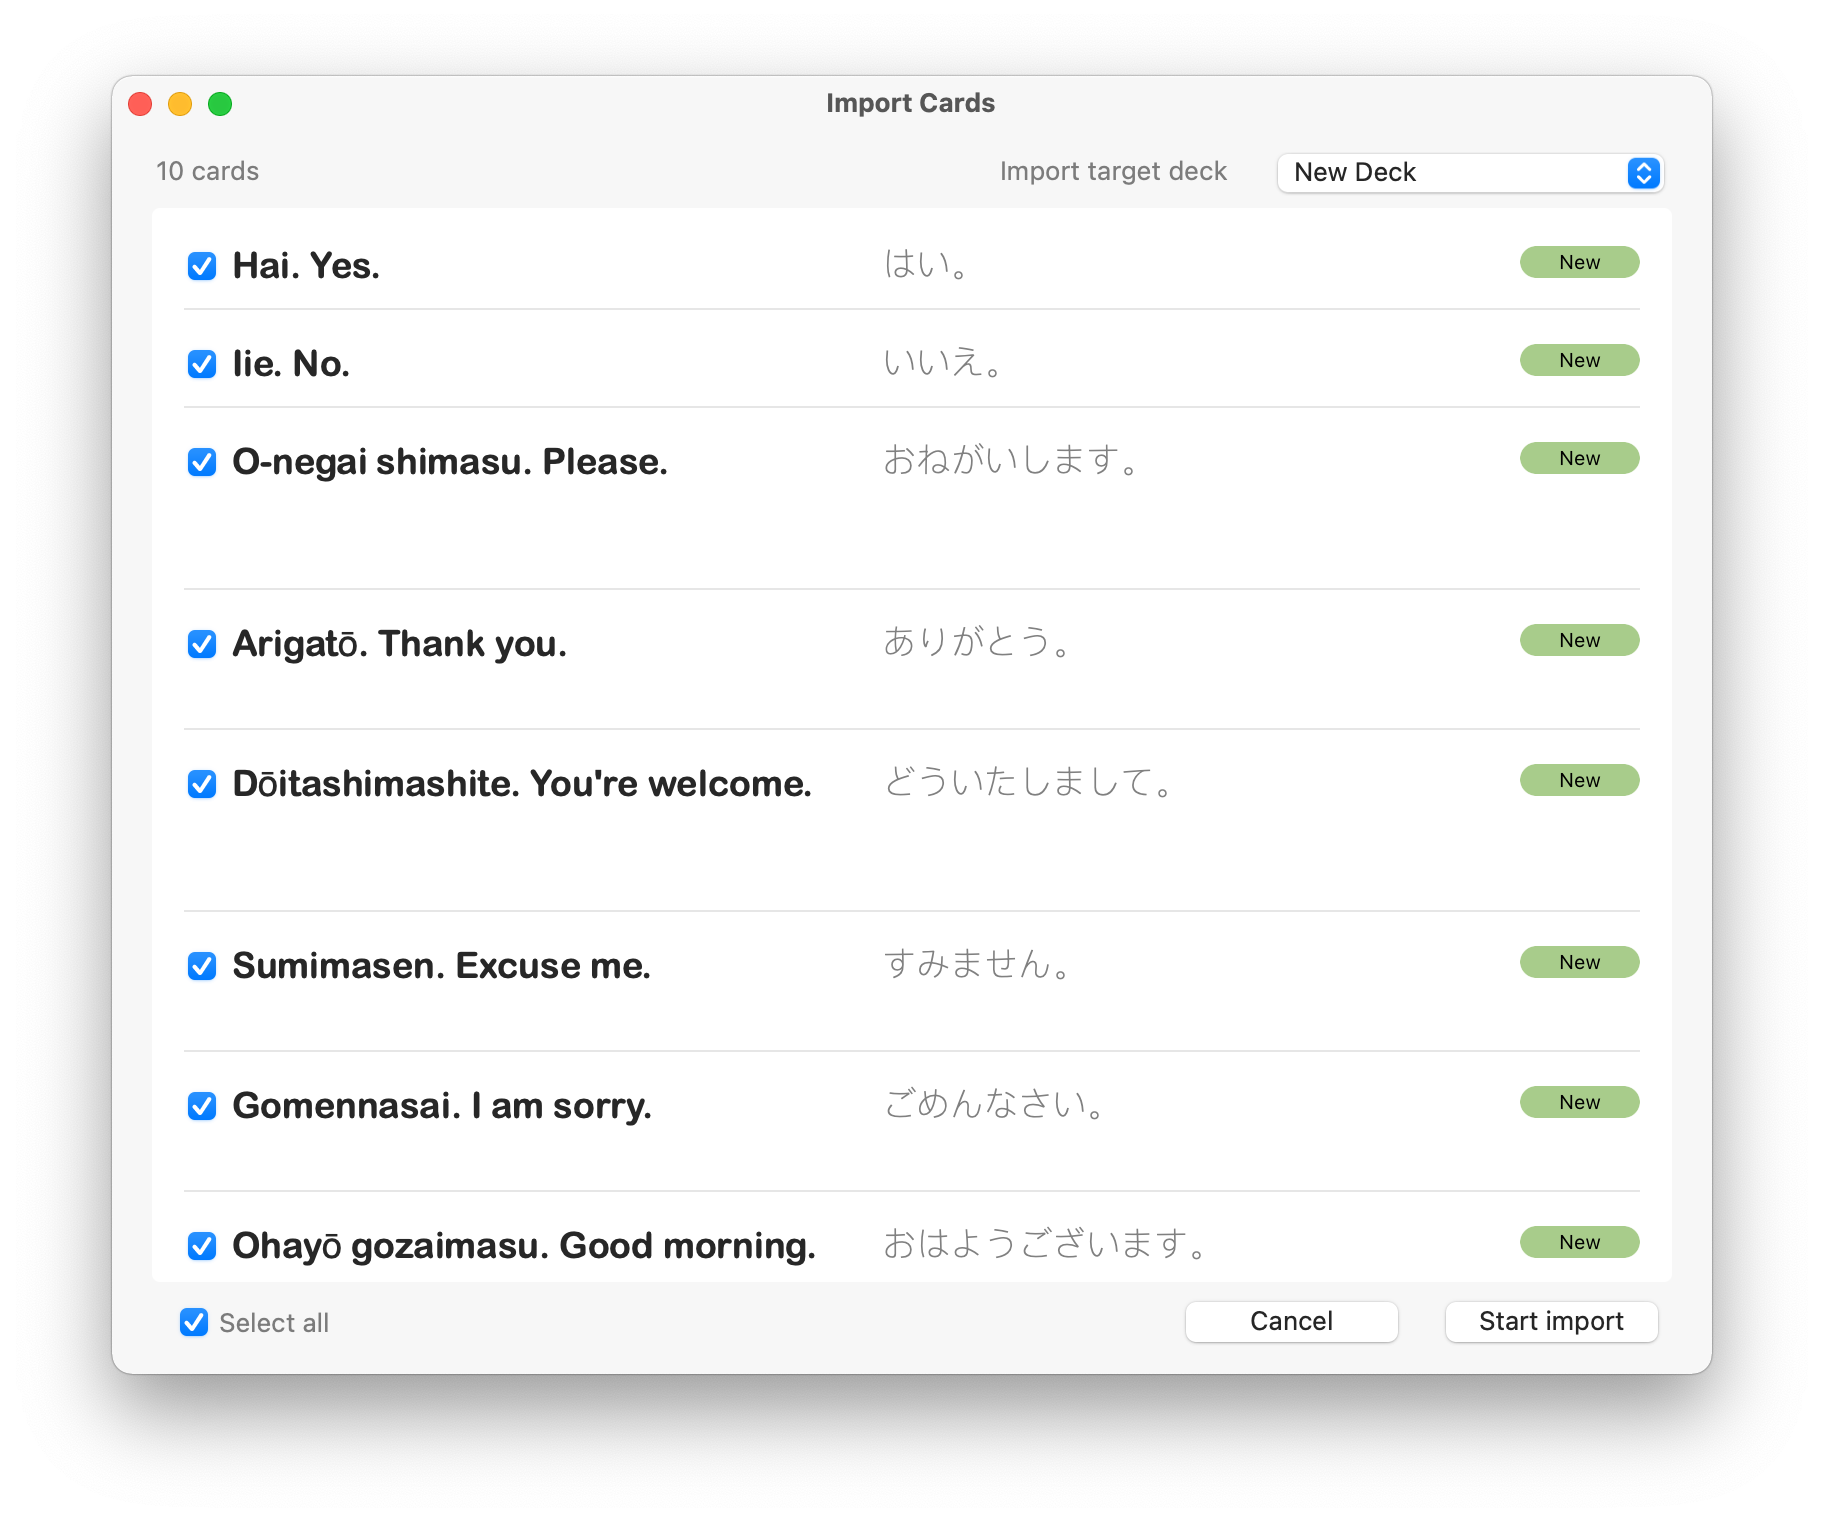
Since this isn’t a table, the app will import it as-is without needing to go through the whole “what delimiter should I use?” screen. Here’s how the above looks in the import preview:
One more thing: dragging and dropping is kind of inconvenient sometimes, so you can use the clipboard instead. Just highlight the text as before, but then just do cmd-C to copy it into the clipboard. Then, in Fresh Cards, select “Import from Clipboard” in the File menu to start the import. It works the same way as drag and drop.